Thursday, December 23, 2010

Cinnamon Ornaments

Tuesday
Dec072010

Crafts: Cinnamon Ornament

The holidays are right around the corner! These ornaments are easy to make and they work as ornaments or gift tag decorations.

How-To

1 cup of ground cinnamon

1 tablespoon ground cloves

1 tablespoon nutmeg

3/4 cup applesauce

2 tablespoons tacky glue*

*Please remember you can't eat these.

1. Combine dry ingredients in a medium bowl and stir in apple sauce and glue.

2. Work for 2 to 3 minutes to form a ball. Too wet, add cinnamon, too dry add applesauce.

3. Knead on a cinnamon sprinkled surface and divide into 4 portions. Roll 1/4 inch thick and cut out with cookie cutters. Use pencil to make hole for string. (Try not to use cookie cutters that are too fussy. The dough can be tough to work with and will not hold delicate shapes.)

4. Dry in a warm oven, 250 to 300 degrees for several hours. I put them in for an hour, then turn off the oven and let them sit in the oven over night.

These smell wonderful when you are making them. We hope you get to squeeze some craft time into your busy holiday schedule.


http://www.houseofbrinson.com/

mid-century modern gingerbread house

WHORANGE'S monthly pad: mid-century modern gingerbread house

Mid-Century_Modern_Gingerbread_House_retro

it's that time of the month again, kittens -- time for WHORANGE'S monthly pad.

today's pad hails from a fantastical candyland with gingerbread walls, coconut shag rugs, and fondant eames chairs. this pad not only satisfies the monthly cravings, darlings, but it does so with mid-century flair.

Mid-Century Modern Gingerbread House

Mid-Century_Modern_Gingerbread_House_retro_eames_shag_rug

Mid-Century_Modern_Gingerbread_House_retro_eames

Mid-Century_Modern_Gingerbread_House_retro_eames_holiday

from the chocolate wafer jackson pollack to the candied noguchi table, every inch is totally edible.

a craveable and crafty case study.

{via trendhunter.}


http://www.whorange.net/whorange/

Oat Floats - maya*made

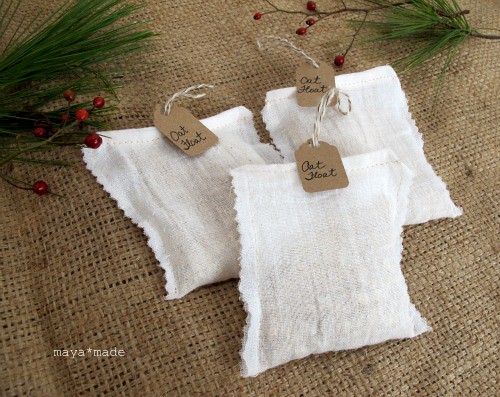
simple gifts: oat floats... or oatmeal "sachets"

oat float

During my first winter on the east coast I discovered the damage that an extremely cold and dry climate can do to your skin. Yikes! I combat our chapped and itchy skin with all kinds of balms and salve, but my favorite remedy is an oat bath. It smells delicious, feels so soothing and is quite miraculous. We made bunches of oat sachets for giving this year. These oat floats make a great addition to a gift basket and a perfect stocking stuffer. I love that they're inexpensive, simple and fast to make... but most of all they make skin soft and happy! I took some pictures to show you how we do it, but it's a basic concept open for your own interpretation. Filling each sachet is a great job for a small helper. Be prepared for scattered oats, but a little mess makes everything a bit more fun, but you know that already. Not a sewer? I bet you could gather oats into the center of a circle of muslin and cinch with a string... make sure it's tied tightly! - maya*made

Oat Floats

Need:
  • muslin
  • wool or cotton string
  • organic oats (pulverized a bit in a blender or food processor)
  • sewing machine
  • pinking shears
Make:
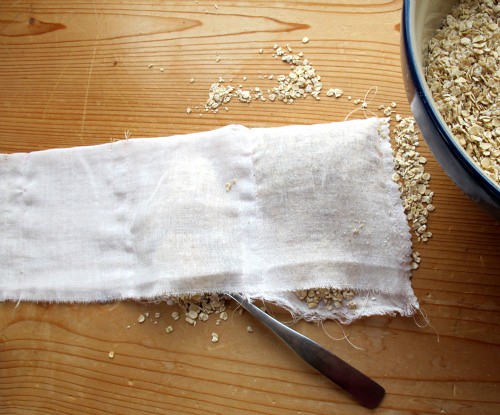
  1. Take a long strip of muslin and fold it over lengthwise.
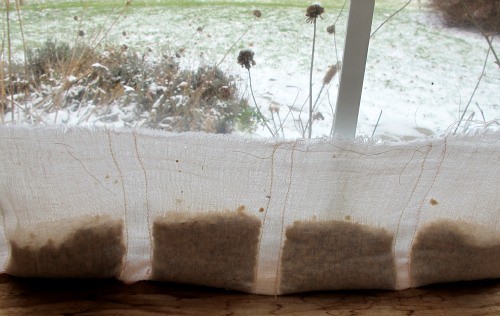
  2. Sew compartments all along the folded strip, keeping a channel between each one for snipping them apart. See photo below in window.
  3. Fill each compartment with a few tablespoons of oats
  4. Slice through each channel with pinking sheers to separate.
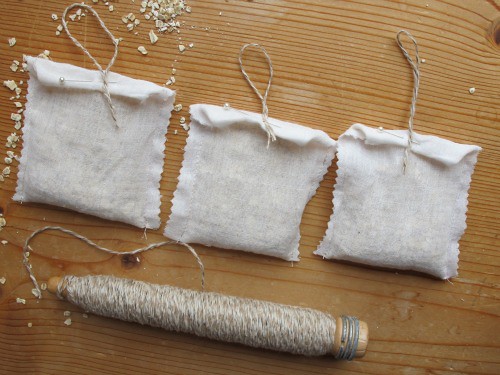
  5. Fold over top and pin with a loop of string.
  6. Sew top shut.
making oat  floats

making oat  floats

making oat  floats

These should be added to a warm bath and can be used as creamy sponge during the soak. My kids love it and so do I! Compost when done. We're filling up "holiday buckets" with these, felted soap, and something yummy I'll share next time.

felted  soap adventures
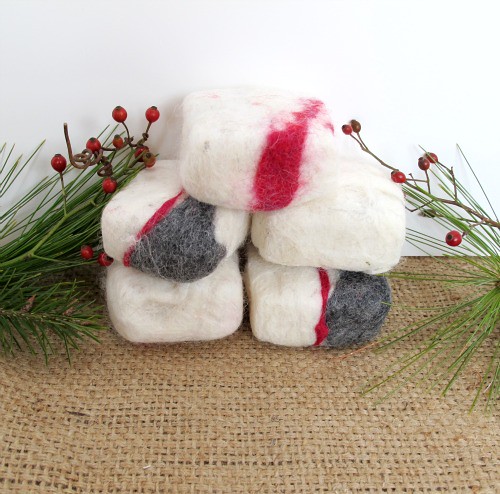
The soap was created without any instructions... just ready hands, a pot of warm water, my friend's handmade soap, and wool roving (mostly from Kate's sheep!). A bit wonky, but very fun.

http://mayamade.blogspot.com/

Blog: The latest news about immigration reform

“What part of legal immigration don’t you understand?

That’s a common refrain from those who think that the answer to fixing our broken immigration system is deporting 12 million people. There is no effort to understand the complexity, the unfairness, or the harsh realities of how our immigration system works. So, with that said, here is Reason magazine’s response to “What part of legal immigration don’t you understand?” from a while back, that is every bit as true today as it was when they first printed it in October of 2008:

Rillettes


Photo by armaburrito on Flickr

Rillettes

The last recipe we recommend as an edible gift and a worthy addition to holiday spreads is a rich French spreadable meat treat called Rillette. Rilettes are similar to pates, but they are more rustic and toothsome. Made by slow simmering meat (or fish) in its own fat with aromatics, rillettes are made by separating the meat, mixing it with a judicious amount of seasoning and mixing it with the flavored fat until it’s spreadable. Once seasoned, it’s set aside to either rest for a few days or packed in jars and stored for a month or so. This recipe is made the old fashioned way. While it can be time consuming, this classic French treat is so rich and lush you won’t mind. Plus it’s not complicated! It's best served with good French bread toasts.

Kitty Greenwald, cook and author, coordinates all things Eatsy — our locally sourced food program. Through communal staff meals held around handmade farm tables, and via seasonal dishes shared with you on our blog, Eatsy aims to nourish and inspire through food.


http://www.etsy.com/storque/how-to/eatsy-holiday-recipes-that-keep-11376/?utm_source=bronto&utm_medium=email&utm_term=Eatsy%3A+Holiday+Recipes+That+Keep&utm_content=etsy_finds_122310&utm_campaign=etsy_finds_122310

Holiday Nuts

Eatsy_cashews_3.jpg

Photo by Rooey Shmool

Holiday Nuts

The second recipe is a holiday nut recipe that friend and fellow Eatsy chef Michelle Fuerst, originally from Sacramento, made at a fall dinner last year. They're so good that I remember them still. They’re the perfect nut recipe in my mind: rich and buttery, peppery and addictive. Michelle never fails to remind one that, “good hors d’ourves are crucial,” or credit her recipe source, which in this instance was her friend and cookbook author Niloufer King. A diligent cook who hates to cut corners, Michelle’s motto when it comes to appetizers is straightforward — good appetizers prepare diners for proper feasts. Thankfully, these happen to be easy and keep well too (though Michelle likes to serve them warm). Sealed in an airtight jar, a peppery cashew gift will make your nearest and dearest nut happy.

1 pound cashews
1 tablespoon butter
salt
Pinch of cayenne
Copious amounts of coarsely ground black pepper

Roast the nuts at 325 degrees for 7 minutes. Continue to roast, while stirring and checking often until the nuts are golden. Once the nuts are cool enough to handle, but still warm, toss them with the butter and seasonings. Taste and add more pepper until the nuts have a pronounced pepper flavor. Allow the cashews to cool an additional 15 minutes, or until they become crisp again.


http://www.etsy.com/storque/how-to/eatsy-holiday-recipes-that-keep-11376/?utm_source=bronto&utm_medium=email&utm_term=Eatsy%3A+Holiday+Recipes+That+Keep&utm_content=etsy_finds_122310&utm_campaign=etsy_finds_122310

Texas Spice Cake

Eatsy_TexasCake_1.jpg

Photo by Rooey Shmool

Texas Spice Cake

1 cup vegetable oil
1 cup prunes, pitted and cut up
1 t. baking soda
3 eggs
2 cups sugar
1 cup buttermilk
2 cups flour
1 t. salt
2 t. cinnamon
2 t. vanilla
2 t. allspice
2 t. cloves
2 t. nutmeg
1 cup pecans

Eatsy_TxCake_2.jpgPhoto by Rooey Shmool

Combine oil, sugar, and spices. Then, add eggs one at a time while mixing. Carefully add soda and buttermilk alternating with flour. Add prunes and nuts. Oil and flour two loaf pans, then pour in the batter. Cook 40-45 minutes in a 350 degree oven.

Glaze

1 cup sugar
1/2 c. buttermilk
1/4 t. baking soda
1/2 stick butter

Boil the ingredients for 5 minutes until sugar is totally dissolved. Pour glaze over the cooled cake while it is still in the pan. Once the cakes are cooled run a knife around the edges and turn the cakes over on a platter.


http://www.etsy.com/storque/how-to/eatsy-holiday-recipes-that-keep-11376/?utm_source=bronto&utm_medium=email&utm_term=Eatsy%3A+Holiday+Recipes+That+Keep&utm_content=etsy_finds_122310&utm_campaign=etsy_finds_122310

Christmas tree ornament mobile

courtesy of
Not  Martha

Christmas tree ornament mobile, how-to

Christmas Tree Ornament Mobile

Christmas Tree Ornament Mobile

Here is how I made my Christmas tree ornament mobile, it was easier than it looks, promise.

The Supplies

Christmas Tree Ornament Mobile

  • a 17" steamer rack from a restaurant supply store
  • about 5 feet of lightweight jack chain
  • a small carabiner
  • 100 basic ornament hooks
  • one roll, 500 feet, monofilament jewelry string (not the stretchy sort)
  • 200 jewelry crimp beads or tubes
  • jewelry crimping tool
  • 100 lanyard hooks
  • 100 ornaments

Note: In the photo above I show earring wire instead of ornament hooks. I changed that later as I found ornament hooks made it far easier to move ornaments around after they'd been hung. Also, my supplies are based on a 4 foot tall mobile using almost 100 ornaments, you'll need to adjust amounts if you make one larger or smaller.

Creating the Mobile Frame

Creating the frame for my ornament tree mobile turned out to be fairly simple. I used a lot of hooks to allow for easy adjustment and additions as the mobile was being assembled. I gathered materials from a restaurant supply store, a hardware store and the jewelry section of a craft store.

Christmas Tree Ornament Mobile

For the top of the mobile I needed something that would allow me to easily secure a lot of hanging points without them sliding around too much. The perfect thing turned out to be a 17-inch steamer rack bought for about $6 from a restaurant supply store (I found mine at Encore Restaurant Equipment in the SODO neighborhood of Seattle). The rack comes with folding feet attached that were easy to pop out with a little bending.

Christmas Tree Ornament Mobile

Turn the rack upside down and the spots where the legs were secured neatly become four hanging points.

Christmas Tree Ornament Mobile

I bought some inexpensive jack chain to use for hanging. You can open and close the links in the chain with needle nose pliers so there isn't any need for heavy duty wire cutters. I separated four lengths of chain, attached them to the points using lanyard hooks found in the jewelry supply section of a craft store.

Christmas Tree Ornament Mobile

I joined the chains using another lanyard hook, and put that on a little carabiner which hung from the hook in the ceiling.

Christmas Tree Ornament Mobile

Notes: Why so many hooks and bits? Because it makes it is simple to adjust and shorten the chain and can later be disassembled and reassembled with very little effort and without needing tools. I kept the same thing in mind when creating the lines that the ornaments were suspended from. This added a bit of visual clutter

Suspending the Ornaments

Christmas Tree Ornament Mobile

I used jewelry monofilament secured with crimp tubes to hold the ornaments. I simply created loops at both ends. I made a bunch of different lengths (details on that below). I secured each line to points in the rack grid using lanyard hooks, and hung a basic wire ornament hook at the bottom ends. The lanyard hooks at the top are strong enough to hold heavier ornaments, and because they close they won't fall off if the mobile is bumped. The basic ornament hooks allow one to easily move ornaments around from one spot to another. My tip to you: Keep the lines as separate as possible while you're working with them. I spent more time untangling clear threads than doing anything else on this project. It was maddening. Maddening I tell you. After I discovered just how maddening I started hanging them in groups by length from a curtain rod and weighing them down with an ornament to keep them separated.

Notes: The use of ornament hooks allows for ornaments to easily be moved around. It does add visual clutter, though. If you want to create a mobile that would only be used once securing the monofilament line directly to the ornaments would look much tidier. I initially planned to use earring wire hooks that closed to hang the ornaments but quickly found that they were frustrating to fiddle with every time I wanted to move an ornament from one spot to another. They were prettier, though, and because those close as well would hold ornaments more securely if the mobile is moved around. (Which I don't suggest as it tangles the lines horribly. So horribly.) Crimp tools come in three sizes Micro, Regular and Mighty (large). I used the regular size. I did try to use nylon sewing thread but found that the crimps didn't secure it well enough. I did consider using nylon sewing thread with micro crimp beads and the micro crimping tool but think one would need a lot of patience and really great lighting to get all that done. The monofilament jewelry string is pretty stiff and easy to work with.

Determining Placement and Lengths

Christmas Tree Ornament Mobile

Figuring out where to put the hanging points on the rack involved a bit of math, most all of which I abandoned. I'll do my best to describe what I did.

I decided to create rings on the rack, with the longer threads hanging on the outside rings to create the cone tree shape. Actually it creates tiers, think a tall skinny wedding cake. I figured that my ornaments were usually about 2 or 3 inches in diameter so I needed to space the rings a little more than 1 inch apart so that the ornaments would have room to hang without being crowded by the longer threads around them. I spaced the rings about 1.5 inches apart. This gave me a center point and 6 rings to work with, with the last ring being the outer edge of the rack, like so:

Christmas Tree Ornament Mobile

I determined I wanted my tree to be about four feet in total height from the top ornament to the bottom. I made the first ornament, the center point, hang 3.5 inches, and added length from there. For my needs, each set of string needed to be 1.75 inches longer than the last. Each ring on the hanging rack held for different lengths of string. I added 2 inches to the length of string I actually cut to allow for the loops.

To figure out how many ornaments per ring I, well, completely made it up. I decided the first ring should hold seven ornaments and went up by four from there. So the number of ornaments went: 1, 7, 11, 15, 19, 23, 27. I divided the four lengths of string between those, giving the longest length more ornaments to help the triangle effect. Whew. So I cut this many at these lengths for these rings:

  • For the Center Point: 5.5"
  • For Ring 1: one at 7.25", one at 9.0", two at 10.75", three at 12.5"
  • For Ring 2: two at 14.25", two at 16.0", three at 17.75", four at 19.5"
  • For Ring 3: three at 21.25", three at 23.0", four at 24.75", five at 26.5"
  • For Ring 4: four at 28.25", four at 30.0", five at 31.75", six at 33.5"
  • For Ring 5: five at 35.25", five at 37.0", six at 38.75", seven at 40.5"
  • For Ring 6: six at 42.25", six at 44.0", seven at 45.75", eight at 47.5"

Christmas Tree Ornament Mobile

In order to make the measuring a cutting go as quickly as possible I taped a cloth measuring tape to a tabletop and marked each length with the number I needed to cut with sticky notes. So all it took was to stretch some string out and clip at the needed point. Keep these in groups at this point forward, it will make it far easier later, and cut down on the amount of time you'll spend untangling. Oy. I looped and crimped the ends, then hung them in groups on a curtain rod weighted down by an ornament.

Christmas Tree Ornament Mobile

To figure out where my rings would fall on the rack I tied a cotton string to my center point and marked it at 1.5 inch intervals. Then I swung the string around and put as many hooks as I needed on each given ring. I usually put them on the X and Y axis first, then filled in the quadrants. It went faster than it sounds, promise. I spaced the hooks, aka the hanging points, like so:

Christmas Tree Ornament Mobile

Looking up at the mobile from below you can sort of see the rings emerging:

Christmas Tree Ornament Mobile

And after this I attached a hook into my ceiling and hung the rack. I found the best way to hang everything is to work from the center out, hang each set of lengths of monofilament string spacing it around the ring as evenly as possible, then hang ornaments before moving on to the next set of lengths of string. By weighing the strings down as you go along it will help them from getting tangled as you work. You can add or move string, and move ornaments around if needed. I didn't worry too much about getting everything just perfect and I think it worked to my advantage, the slightly controlled randomness gives it a nicely organic look. At least I hope so.

Christmas Tree Ornament Mobile

If I were to do it again I would make my tree taller and more dramatic. I think I would try to squeeze in one more ring and stagger the ornaments with even more lengths of string, maybe in increments by the inch. As it was I found that there are lots of spots where two of the same length are side by side. If I had more money to devote I would buy glass ornaments that don't have a metal cap, just a glass loop at the top, and would skip the ornament hooks to make it look tidier.

Christmas Tree Ornament Mobile

I'm growing more and more fond of the mobile with clear glass ornaments.


http://www.notmartha.org/archives/2010/12/21/christmas-tree-ornament-mobile-how-to/

Girl with Balloon

ETSY Find: Banksy Graffiti Art - Girl with Balloon No. 3 - 8x10 Print of an Original Photograph

From davidsphotography

Banksy  Graffiti Art - Girl with Balloon No. 3 - 8x10 Print of an Original  Photograph
zoom
Banksy  Graffiti Art - Girl with Balloon No. 3 - 8x10 Print of an Original  Photograph Banksy  Graffiti Art - Girl with Balloon No. 3 - 8x10 Print of an Original  Photograph Banksy  Graffiti Art - Girl with Balloon No. 3 - 8x10 Print of an Original  Photograph
This is a print of an original photograph of a Banksy graffiti art. The image is 8x10 and is professionally printed on 8.5x11 archival Kodak paper for true colors and decades of enjoyment.

I’ve included an image showing what the print looks like when matted and framed. Mat and frame not included in purchase.

Please read my profile to learn more about my graffiti images.

Image can be printed in the following sizes. Please convo me for additional information.

11x14 $12.95
12x18 $14.95
16x20 $19.95

http://www.etsy.com/shop/davidsphotography?ref=seller_info

Wednesday, December 22, 2010

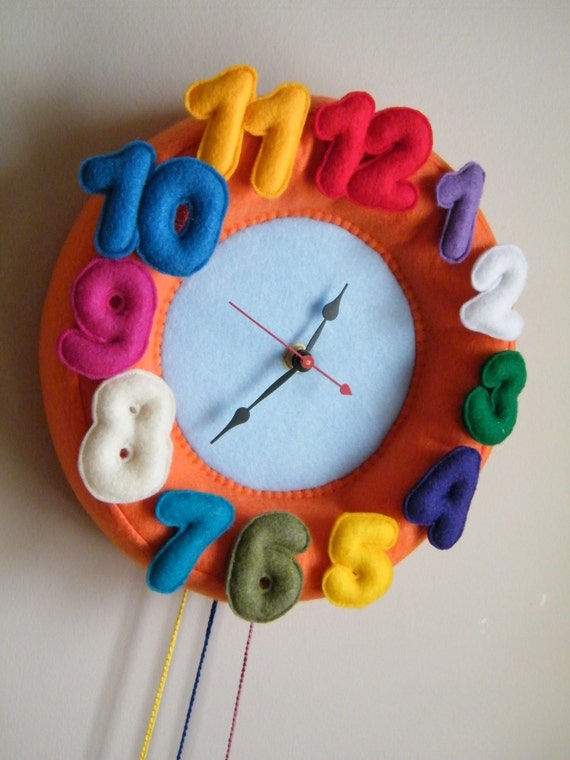
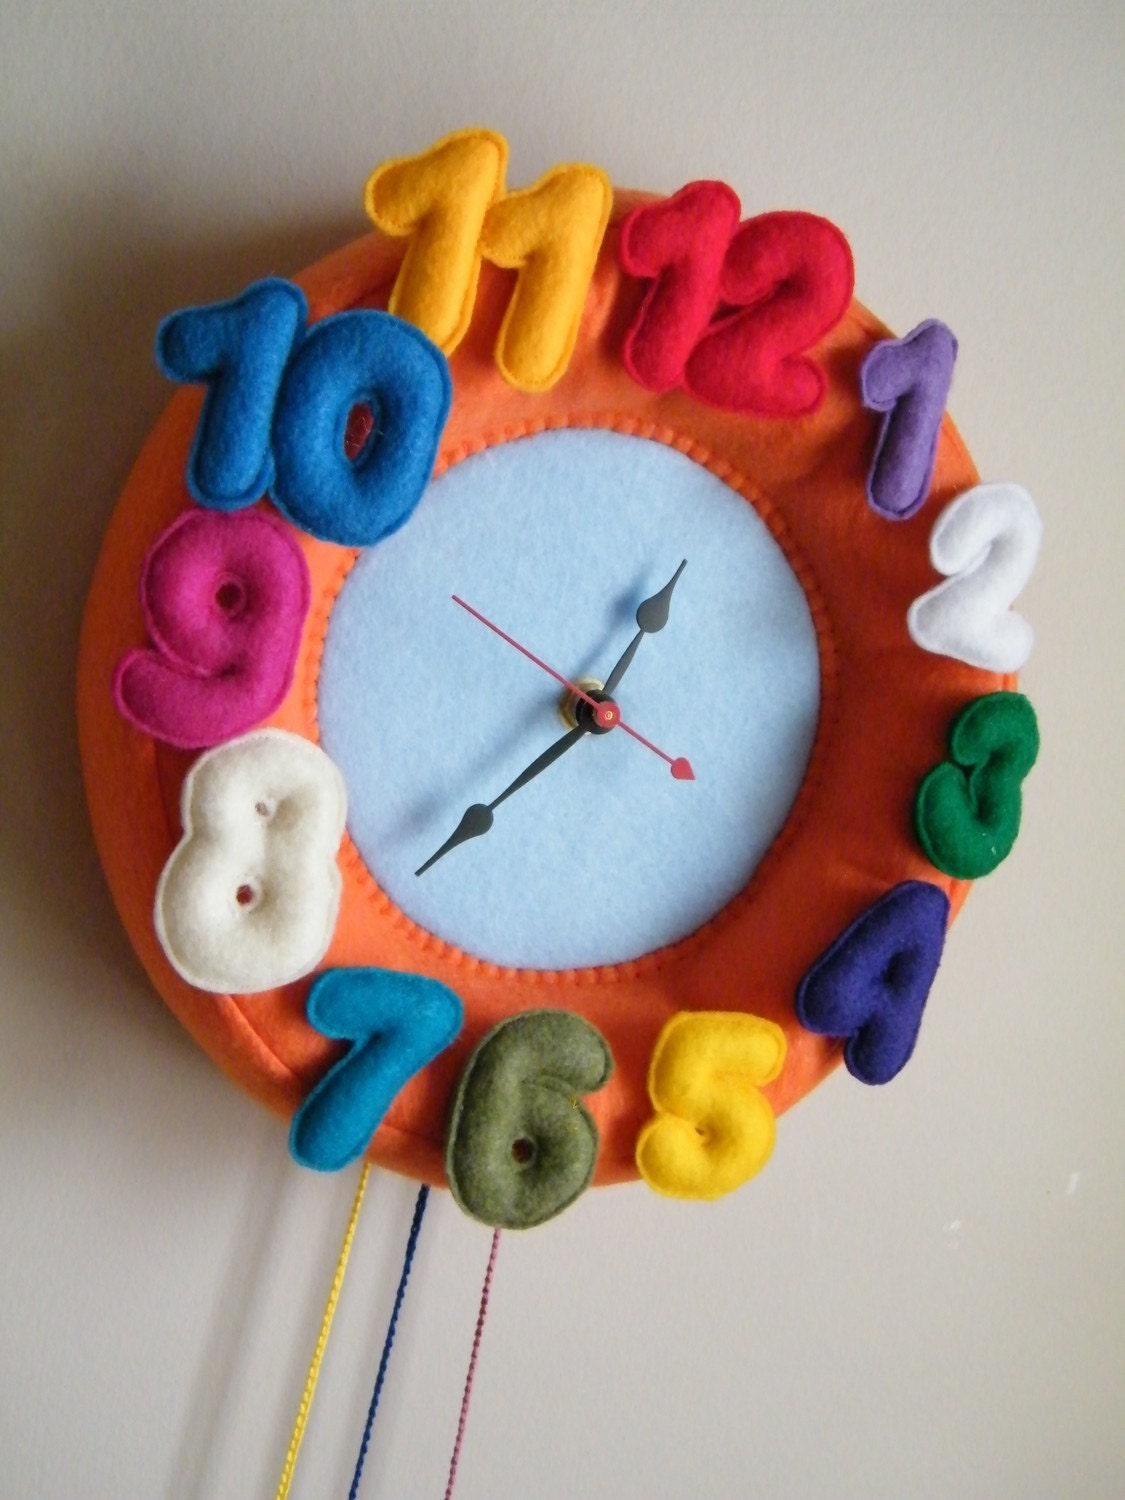
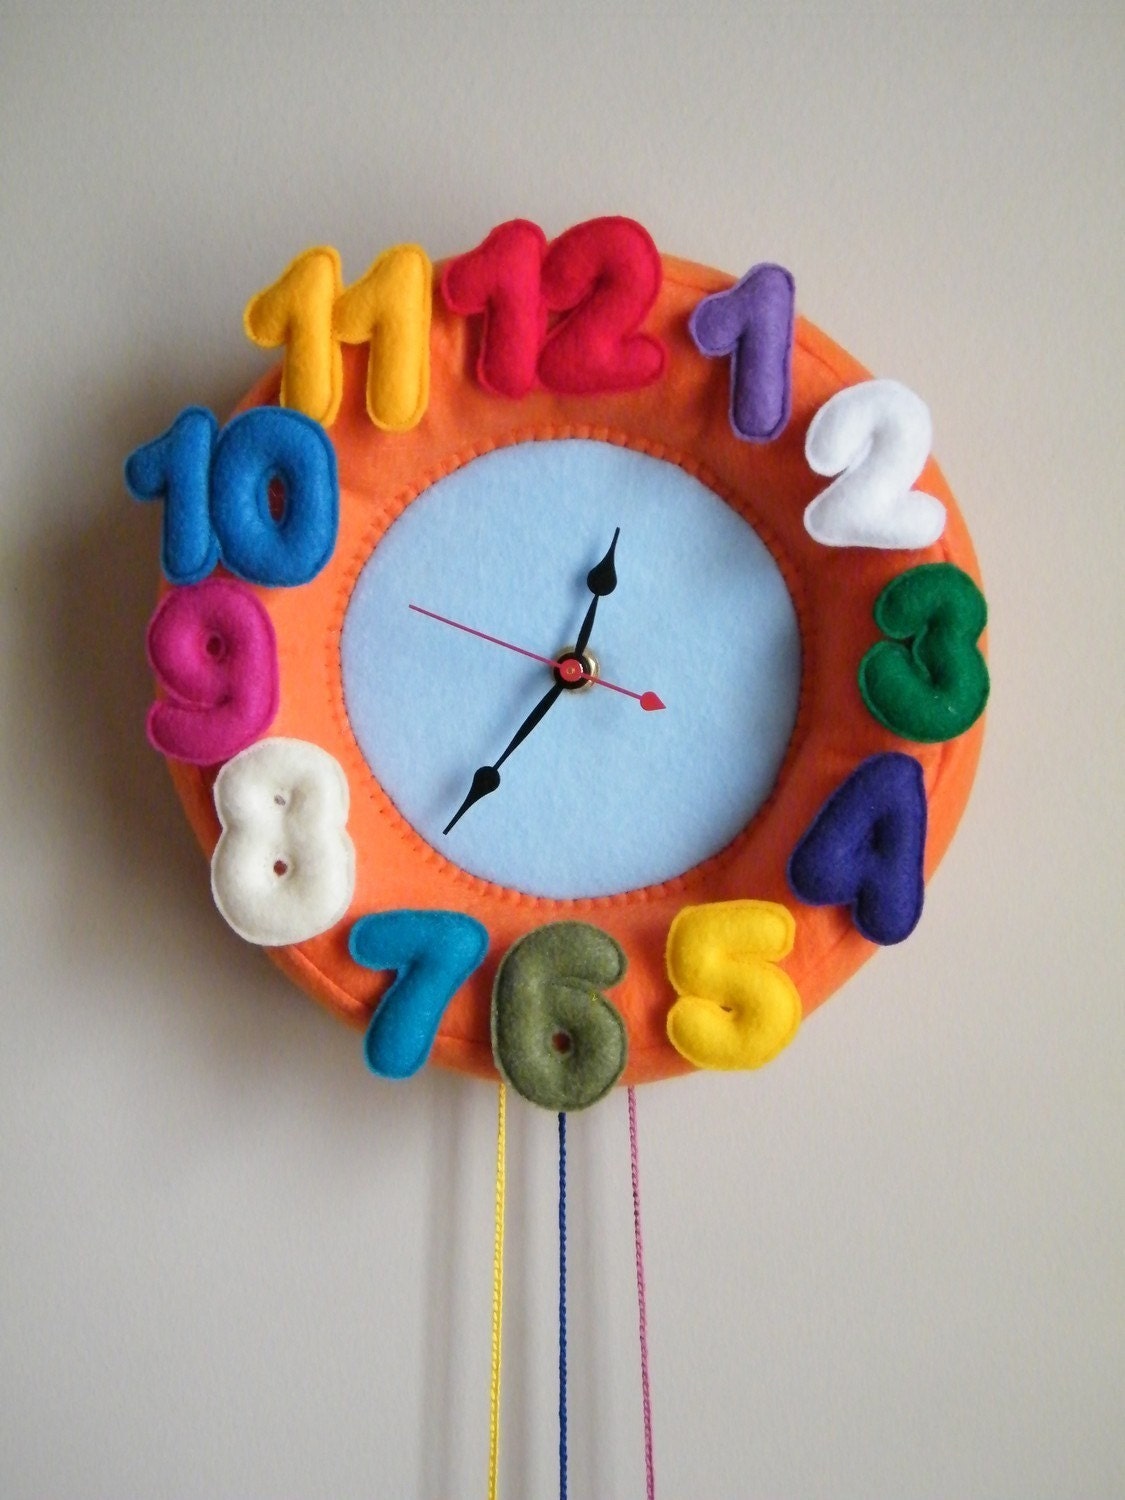
Children Wall Felt Clock - Round Orange

ETSY Find:

Children Wall Felt Clock - Round Orange

From evgie

Children  Wall Felt Clock - Round Orange
zoom
Children  Wall Felt Clock - Round Orange Children  Wall Felt Clock - Round Orange Children  Wall Felt Clock - Round Orange Children  Wall Felt Clock - Round Orange Children  Wall Felt Clock - Round Orange
Beautiful, stylish and trendy felt clock for Child's Bedroom or Nursery Wall designed to give kids another fun point of interest in their rooms.

The color of your choice.

Handcrafted, made of felt and measures 9.5-inch diam.
Requires 1 AA battery.

We use high quality eco-friendly felt made of 100% post-consumer recycled plastic bottles.

MORE OPTIONS! Please check the following:


Alphabet Letters PLUS EXTRA in ABC BAG:
http://www.etsy.com/listing/45527463/alphabet-soup-abc-plus-set

http://www.etsy.com/listing/50388530/alphabet-soup-simple-abc-plus-set

Kids Wall Art - Aquatic Applique Collection:
http://www.etsy.com/view_listing.php?listing_id=43711711


Looking for something different but havent found it yet? Drop us a line with your questions, feedback, or just to say hello.

Thanks for visiting!

Evgie

http://www.etsy.com/shop/evgie?ref=seller_info

Macadamia-White Chocolate Brownies

Makes: 5 dozen

Macadamia-White Chocolate Brownies

Makes: 5 dozen

Ingredients:

6 ounces bittersweet or semisweet chocolate
1 cup unsalted butter
1 1/4 cups all-purpose flour
2/3 cup unsweetened cocoa powder
1 1/2 teaspoons baking powder
1/4 teaspoon salt
6 eggs
2 1/4 cups sugar
2 teaspoons vanilla extract
1 cup (6 ounces) white chocolate chips
1 1/4 cups macadamia nuts, chopped

Directions:

Preheat the oven to 350°F. Line a 10-by-15-inch pan with aluminum foil, shiny side up, and grease lightly.

In the top pan of a double boiler, combine the chocolate and butter. Place over the lower pan of hot water and heat until melted, then stir until smooth and let cool. In a bowl, stir together the flour, cocoa, baking powder, and salt. In the large bowl of an electric stand mixer fitted with a whip attachment, beat the eggs until light and fluffy. Beat in the sugar and vanilla, mixing well. Stir in the white chocolate chips and 3/4 cup of the nuts. Spread in the prepared pan and sprinkle with remaining nuts. Bake for 25 to 30 minutes, or just until just barely set. Let cool in the pan on a rack, then cut into 1 1/2-inch squares.

Store the brownies in an airtight container for up to 4 days.

Variation: For an everyday brownie, omit the macadamia nuts and white chocolate chips and add 1/4 cups chopped walnuts or pecans and 1 cup (6 ounces) double or semisweet chocolate chips.

Excerpted from The Christmas Cookie Book by Lou Seibert Pappas with permission from Chronicle Books © 2000. Photographs by Frankie Frankeny.

From  the Cookbook

The Christmas Cookie Book

The Christmas Cookie Book